Giving Old Tiles New Life
My clients, Justin and Melissa were ready to update their bathroom and kitchen. I had worked with them previously choosing colours and furnishings for the living room, hall and bedrooms. The kitchen worked well and really just needed a facelift. We arranged for new cupboard doors to be installed on the old carcasses and chose a new tap which brought the kitchen into Melissa and Justin’s style. However, replacing the dated brown tiled splashback would be costly and potentially could result in having to replace or repair the existing benchtop. So I suggested painting the tiles. Justin and Melissa pick up the story.
Justin and Melissa here. Thanks to White Knight, we have a splashback we are very happy with. Here is our story and we hope you enjoy it while picking up a few pointers along the way.
So after settling on a colour (Ashen Mist by Taubmans), we used White Knight Tile & Laminate Cleaner, Tile & Laminate Primer and Tile Paint. Before launching into anything, we sat down to watch the instructional video from the White Knight YouTube channel. We found this exceptionally helpful in showing us the steps of painting and things to look out for when taking on this project.
Armed with this knowledge, we set off painting. First, we cleaned the tiles thoroughly with the Cleaner as that was stressed in the video. After allowing the surface to dry, we had to sand down the tiles with 120G sandpaper in order to improve the paint’s adhesion to the tiles. This required some good elbow grease as the rougher the tiles, the easier the paint will stick, so we had to get this step right.
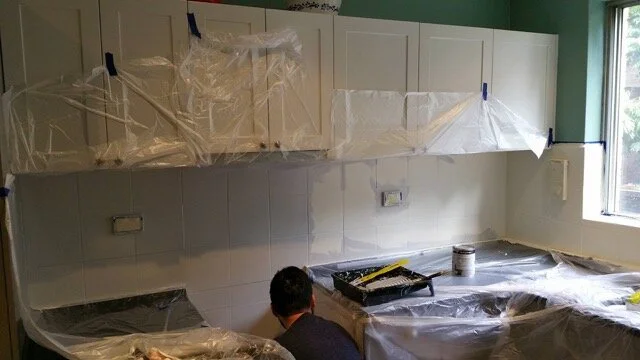
Upon cleaning the dust from the sanding and taping up the edges and sockets, we went about applying the Primer as an undercoat with a small roller brush for the main areas and a 1-inch brush for the edges. As it is quite viscous, it sticks well to the tiles (possibly thanks to the rigorous sanding we did). Four hours later, we started applying the paint itself in two coats, leaving 4 hours between coats (we actually left it overnight as it was getting dark on Saturday so we picked up again on Sunday morning).
A tip that we discovered was that as the paint is an oil-based, it is vital to have paint solvent on hand. After finding the paint had started clogging the brush and roller despite leaving it in water, pouring solvent on them quickly dissolved the paint. A little water after to wash off the excess solvent and we were back in business for the second coat. We let that dry and peeled off the tape, taking the advice to allow a full week to let the paint cure (that included using the oven for all our food as using the stovetop was out of the question!)
Last but not least, here are a couple more lessons we learnt on our journey that we hope you find useful:
Remove the covers from the electrical sockets before taping and painting; it’ll give a nice seamless finish when you pop the cover back on.
The paint doesn’t work well with silicone so you end up with an uneven edge of paint on the silicone that was in the corner between the tiles and the bench top. I suggest buying new silicone (black in our case) and reapplying it to give these corners a nice finish again.
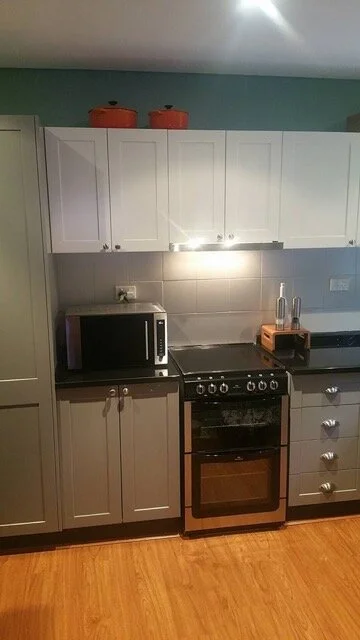
It’s amazing how this simple change of colour makes the kitchen look brand new. With this missing piece in place, it really completed the look we were going for. The paint has really held up after curing and splashes from cooking on the stove top wipe off with ease.
We hope we’ve inspired you to try your hand at a simple update of your bathroom or kitchen. Happy painting!
Isn’t this a great way to revive your home? Take a look at the other White Knight products and if you need any assistance with colour or design for your home, contact me for an appointment.


